Hydraulic Door Installation Guide
These illustrations are to be used as an overview guide. Fully detailed instruction manuals are shipped with each hydraulic door with step-by-step instructions.
Step 1 - Preparing the door for installation
Position the door near the building opening.
Schweiss Hydraulic Door frame shown in two pieces
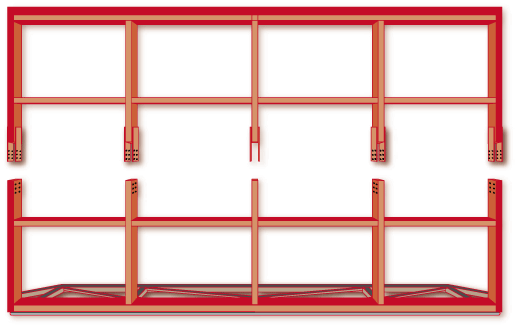
Step 2 - Assemble the door frame
Slide top half and bottom half
Line up the pre-drilled holes in the splice plates and the door members.
Install the (5/8" x 3 1/4") bolts through the splice plates and door members
Make sure the top half and bottom half of the door frame line up with each other and tighten the bolts
Bolting is now complete now verify the alignment of the door frame.
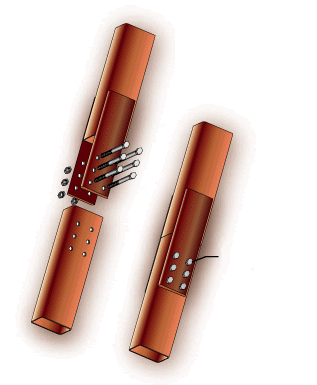
Top half of door frame
(6) Structure Bolts
5/8" x 3-1/4"
Step 3 - Positioning the door
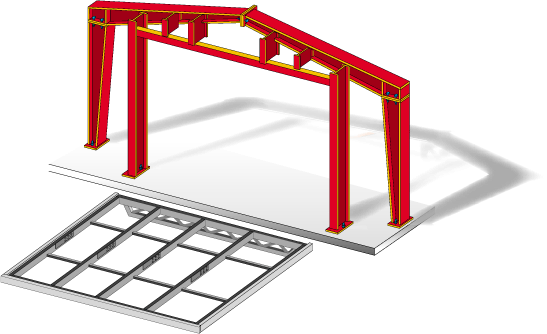
Position the door squarely in front of the rough opening on your building.
Step 4 - Hydraulic fittings
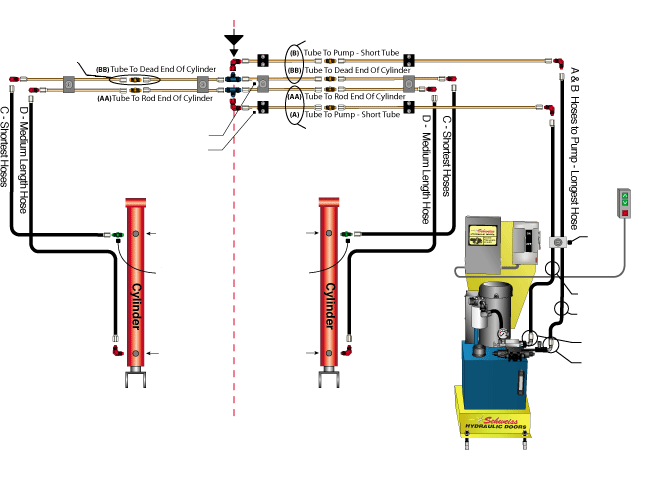
Your hard pipe, fittings, mounting brackets, and hoses will be sent in sections and must be assembled.
Included is a plumbing schematic for your hard pipe lengths and placement
The following parts are needed. (Refer to page 8)
The hard pipe and fittings will have to be mounted to the inside of the building, just above the opening of the
door as shown on the plumbing schematic. The T's will be placed in the center of the opening.

90° Elbow
Restrictor / Dead End
Splice Connection
Twin Tube Clamp
Twin Hose Clamp
Hard Pipe
When Needed
A Tubes
Single Tube Clamp
Rod End
Rod End
To Dead End
Stop
Switch
Hose
Clamp
Rod End
Dead End
building looking out.
Step 5 - Mounting the 2 hydraulic cylinders
Positioning of the Cylinders. Position the cylinders with the clevis end at the bottom of the door. Ports must face away from the door frame.
Start by pinning the top of each cylinder to the framework. Insert the clip pin in each hole on the cylinder pin.
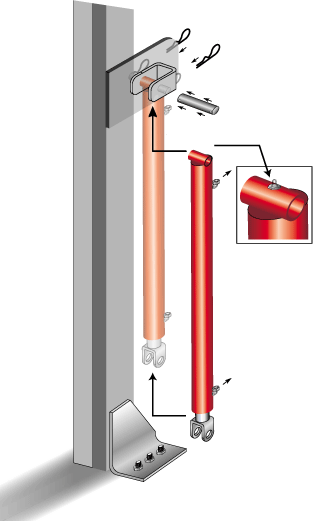
When do you hook up fittings and hoses?
Plumbing the hydraulic cylinders:
Starting on the cylinder farthest from the pump.
Temporarily secure loosest end to the door until final pump hook-up.
Temporarily secure all hoses in such a way that they will not be pinched or crushed during the install of the door into the rough opening.
If you have an outside mount door, cylinder hoses #'s 1,2,3 & 4 will not be able to be attached to the hard pipe until the door is secured into the rough opening.
Step 6 - Installing the door into your building opening
Special Note: Building Sheeting
New Construction: Leave the building sheeting off around the doors opening, until the door had been completely installed.
Existing Structure: Remove the building sheeting off around the doors opening, until the door had been completely installed.
Use the proper sized forklift to elevate your door into position.
The door will weigh roughly 5 lbs. per square foot plus any options added to the door.
Safety First:
Be sure that your fork lift is rated to lift the full weight of the door.
Always carry the loads within the forklifts manufacturer recommended capacity.
Secure the door to the forklift with chains to make sure the door will not fall.
Keep the door secure to the forklift with chains until the door has been securely fastened to the building structure.
Lift and move the door forward into the opening until the door frame is in the door opening.
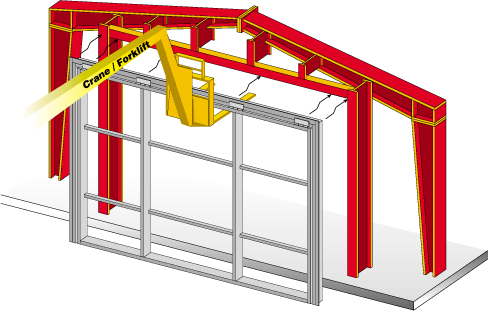
Lower the door onto the concrete floor, door jambs should be resting on the floor.
Do not lift the door header tight against the building header.
Maintain a 3" space between the finished floor and the bottom of your door frame.
Square both sides of the door and flush within the face of the building opening.
Maintain a 1-??" spacing between the door and the door jamb.
The door jamb footer should be sitting on the floor. Do not lift the door header tight against the building header.
Step 7 - Fastening the door to your building
Securing the top of the door.
Header must be level, then secure the attachment angles (Hinges) to the building structure.
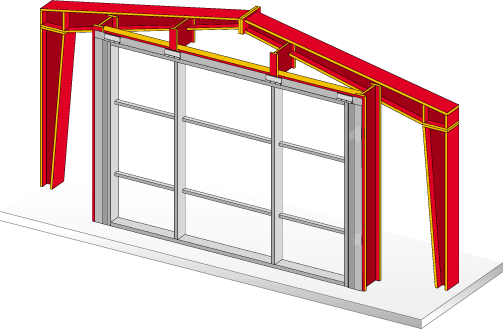
Step 8 - Fasten the door jambs
Fasten the door jambs into the concrete by drilling and placing the anchors
Securing side jambs of the door
Secure the door jamb to the building - Use the Pre-drilled holes
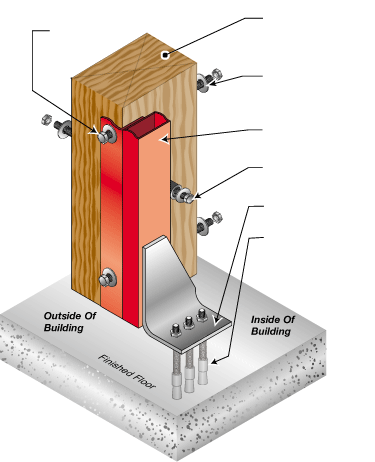
of side column
Column
Depending on your
building side column.
You man need longer
bolts than what are
supplied
of column
to secure base of leg
to finished floor.
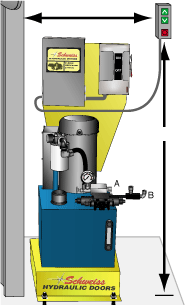
Step 9 - Placing a pump
Pump may be located in a storage room
Keep pump clear of the door opening
Floor Mount
Has its own pedestal, sets on its own - no fastening needed.
Wall Mount
Legs both will secure it to the wall
Fill the reservoir - with automatic transmission fluid or light weight hydraulic fluid
Install the hydraulic lines
Power can now be supplied to the pump.
There is a wiring schematic located on the pump.
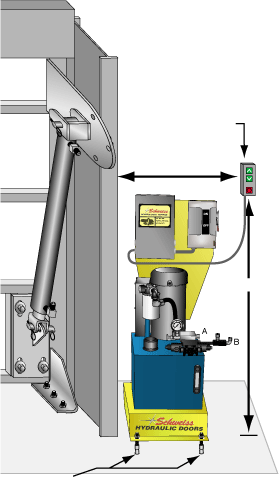
Inside Building
Up/Down/Stop
Switch
bolts to secure base to finished floor.
Step 10 - Checking hydraulic fluids / Cotter Pins
Check to make sure that there is fluid in the reservoir (we suggest the use of automatic transmission fluid or a light weight hydraulic fluid for optimal door operation).
Before hooking up the clevis end of the cylinder, turn the pump on and cycle the cylinders up and down several times to fill the lines with fluid.
More fluid may be need to be added to fill the lines and cylinders.
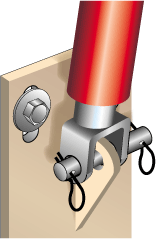
Once the cylinders have been cycled several times, the clevis end of the cylinder can be pinned to the lower pinpoint of the door.
Do not forget to insert the other keys into the pins.
Also remember to bend the ends of the cotter keys over after they have been inserted into the pins.
NOTE: Use the pump to run cylinder ram up or down as needed to line up the clevis end of the cylinder to the pinpoint.
*After cycling the cylinders, the fluid level in the reservoir should be at 3/4 full while the cylinders are in the retracted position.
Step 11 - Check over the door
Take time to check the door over. Make sure all installation welds are complete, bolts, through bolts and cotter keys are all in place.
Step 12 - Cycle the door
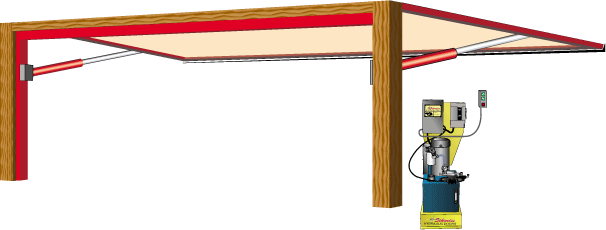
It is time to cycle the door.
The door will operate, open and close by pressing the buttons on the 2 button control station. If you have a remote unit the pump will power and cycle the door at the same time by depressing the buttons on either the receiver box or the hand held unit.
Step 13 - Open the door
Open the door far enough so that the top seal is away from the header.
Apply the self adhesive foam weather stripping to the side and top seals of the door.
About this installation guide
These instructions are to be used as an overview guide. Fully detailed instruction manuals are shipped with each door with step-by-step instructions.